Hello!
Recently I am working on a project in python that uses CV2 module
to stream video from IP camera, analog camera and local video file.
First I used Anaconda to install required packages (coz the
project needs dark flow and tensor flow as well).
I tested many pre-built OpenCV modules, but there were a problem
showing video in the project. The problem was missing FFMPEG in the OpenCV
package. Also there were some OpenCV packages that the authors claimed the
packages are compiled with FFMPEG enabled such as https://anaconda.org/phhuang/opencv
by using following code
conda install -c phhuang
opencv
But I still couldn't play videos in python. I waste my time about
3 days!
I decided to use PIP for installing OpenCV packages, there were
useless, too.
The last and the most complicated way was to try building and
installing my own OpenCV package by myself. There were many instructions on the
internet, but finally I used one of them and succeeded!
To build OpenCV with FFMPEG enabled you can do these steps:
1) Download the latest version (3.2.0 in my case) of OpenCV
from https://sourceforge.net/projects/opencvlibrary/files/opencv-unix/ using
the following code in Ubuntu terminal:
wget
http://downloads.sourceforge.net/project/opencvlibrary/opencv-unix/3.2.0
2) Unzip the zip file:
unzip opencv-3.2.0.zip
3) Change current working directory:
cd opencv-3.2.0
4) Make a folder for output of making:
mkdir build
5) Go to build folder:
cd build
6) Use this command to make OpenCV with FFMPEG support:
cmake -D CMAKE_BUILD_TYPE=RELEASE
\
-D
CMAKE_INSTALL_PREFIX=/home/vdk/opencv-3.2.0 \
-D INSTALL_C_EXAMPLES=OFF \
-D INSTALL_PYTHON_EXAMPLES=OFF \
-D
OPENCV_EXTRA_MODULES_PATH=/home/vdk/opencv_contrib-3.2.0/modules \
-D BUILD_EXAMPLES=OFF \
-D BUILD_opencv_python2=OFF \
-D WITH_FFMPEG=1 \
-D WITH_CUDA=0 \
-D
PYTHON_DEFAULT_EXECUTABLE=/usr/bin/python3.6 \
-D
PYTHON3_EXECUTABLE=/usr/bin/python3.6 \
-D
PYTHON_INCLUDE_DIR=/usr/include/python3.6 \
-D PYTHON_LIBRARY=/usr/lib/python3.6/config-3.6m-x86_64-linux-gnu/libpython3.6.so
\
-D
PYTHON3_PACKAGES_PATH=/usr/lib/python3/dist-packages \
-D
PYTHON3_NUMPY_INCLUDE_DIRS=/usr/local/lib/python3.6/dist-packages/numpy/core/include
..
Tips:
· You can change those options depend on your needs. -D WITH_FFMPEG=1 enables FFMPEG (you can play video when Import CV2)
· Replace path variables with proper paths in the mentioned command.
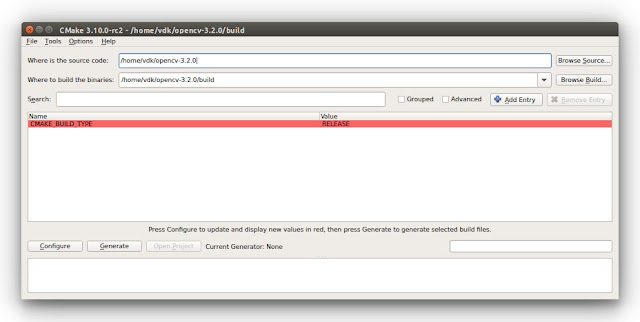
· You can also use cmake with GUI. Download cmake-3.10.0-rc2-Linux-x86_64.sh at https://cmake.org/download/. Then run the following command:
chmod +x cmake-3.10.0-rc2-Linux-x86_64.sh
and then run the file to install GUI cmake.
./cmake-3.10.0-rc2-Linux-x86_64.sh
It is easier to use GUI cmake.
You can enter values by clicking Add Entry, then set
the source and destination location and finally click on Configure.
7) Use following command to make.
make -j4
Tips:
·
j4 means 4 cpu cores
will be used during build process. You can use just make to start build process
by single core.
8) Now, install OpenCV.
sudo make install
9) Run the following command.
sudo sh -c 'echo
"/usr/local/lib" > /etc/ld.so.conf.d/opencv.conf'
10) And then
sudo ldconfig
Finish!

Comments
Post a Comment